A Chocolate Valentino! When that was posted - I was thrilled!!! I love cake, I love chocolate, and I love to try new things! All of which fit the bill here. :)
The February 2009 challenge is hosted by Wendy of WMPE's blog and Dharm of Dad ~ Baker & Chef. We have chosen a Chocolate Valentino cake by Chef Wan; a Vanilla Ice Cream recipe from Dharm and a Vanilla Ice Cream recipe from Wendy as the challenge.
February’s challenge is a Flourless Chocolate Cake, Chocolate Valentino, inspired by Malaysia’s “most flamboyant food ambassador”, Chef Wan. Recipe comes from Sweet Treats by Chef Wan.
OK - so my first attempt, I wanted to be bold and try a White Chocolate Valentino. Well....here it is:

Looks OK, right?! WRONG!

This is what it looked like after I tried to get it out of the pan. :( I was sad! So, I posted to my fellow DB'ers for help. Turns out....if you use White Chocolate, you need to cut the butter in half! I didn't know that, obviously. LOL
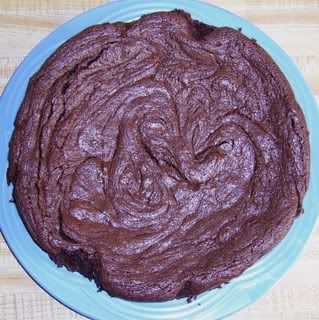
Alright, so back to the drawing board. :) I decided I was just going to go with a semi-sweet chocolate this time.
VOILA!

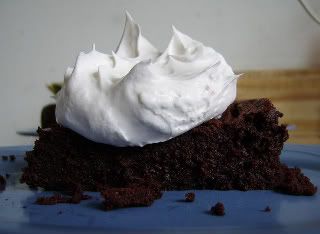
Here is a nice little slice (and yes, I mean little - this baby is RICH!)

Unfortunately, I didn't get a chance to try to make the ice cream. :( I've been REALLY busy with school and such lately.
Anyhoo - I'm really excited about my first DB Challenge and look forward to future challenges! :)
Here is the recipe used (and below you will find recipes for ice cream!):
Chocolate Valentino
Preparation Time: 20 minutes
16 ounces (1 pound) (454 grams) of semisweet chocolate, roughly chopped
½ cup (1 stick) plus 2 tablespoons (146 grams total) of unsalted butter
5 large eggs separated
1. Put chocolate and butter in a heatproof bowl and set over a pan of simmering water (the bottom of the bowl should not touch the water) and melt, stirring often.
2. While your chocolate butter mixture is cooling. Butter your pan and line with a parchment circle then butter the parchment.
3. Separate the egg yolks from the egg whites and put into two medium/large bowls.
4. Whip the egg whites in a medium/large grease free bowl until stiff peaks are formed (do not over-whip or the cake will be dry).
5. With the same beater beat the egg yolks together.
6. Add the egg yolks to the cooled chocolate.
7. Fold in 1/3 of the egg whites into the chocolate mixture and follow with remaining 2/3rds. Fold until no white remains without deflating the batter.
8. Pour batter into prepared pan, the batter should fill the pan 3/4 of the way full, and bake at 375F/190C
9. Bake for 25 minutes until an instant read thermometer reads 140F/60C. Note – If you do not have an instant read thermometer, the top of the cake will look similar to a brownie and a cake tester will appear wet.
10. Cool cake on a rack for 10 minutes then unmold.
Dharm's Ice Cream Recipe
Classic Vanilla Ice Cream
Preparation Time: 30 minutes
Recipe comes from the Ice Cream Book by Joanna Farrow and Sara Lewis (tested modifications and notes in parentheses by Dharm)
Ingredients
1 Vanilla Pod (or substitute with vanilla extract)
300ml / ½ pint / 1 ¼ cups Semi Skimmed Milk – in the U.S. this is 2% fat
4 large egg yolks
75g / 3oz / 6 tbsp caster sugar {superfine sugar can be achieved in a food processor or use regular granulated sugar}
5ml / 1 tsp corn flour {cornstarch}
300ml / ½ pint / 1 ¼ cups Double Cream (48% butter fat) {in the U.S. heavy cream is 37% fat)
(you can easily increase your cream's fat content by heating 1/4 cup of heavy cream with 3 Tbs of butter until melted - cool to room temperature and add to the heavy cream as soon as whisk marks appear in the cream, in a slow steady stream, with the mixer on low speed. Raise speed and continue whipping the cream or use heavy cream the difference will be in the creaminess of the ice cream.)
1. Using a small knife slit the vanilla pod lengthways. Pour the milk into a heavy based saucepan, add the vanilla pod and bring to the boil. Remove from heat and leave for 15 minutes to allow the flavours to infuseLift the vanilla pod up. Holding it over the pan, scrape the black seeds out of the pod with a small knife so that they fall back into the milk. SET the vanilla pod aside and bring the milk back to the boil.
2. Whisk the egg yolks, sugar and corn-flour in a bowl until the mixture is thick and foamy.
3. Gradually pour in the hot milk, whisking constantly. Return the mixture to the pan and cook over a gentle hear, stirring all the time
4. When the custard thickens and is smooth, pour it back into the bowl. Cool it then chill.
5. By Hand: Whip the cream until it has thickened but still falls from a spoon. Fold it into the custard and pour into a plastic tub or similar freeze-proof container. Freeze for 6 hours or until firm enough to scoop, beating it twice (during the freezing process – to get smoother ice cream or else the ice cream will be icy and coarse)By Using and Ice Cream Maker: Stir the cream into the custard and churn the mixture until thick (follow instructions on your ice cream maker)
Wendy's Ice Cream Recipe
Vanilla Philadelphia Style Recipe
Preparation Time: 5 minutes
2 cups (473 ml) of half and half (1 cup of heavy cream and 1 cup of whole, full fat milk)
1 cup (237 ml) heavy cream
2/3 (128 grams) cup sugar
Dash of salt
1 (12 grams) tablespoon of vanilla
Mix all ingredients together (we do this in a plastic pitcher and mix with an emulsifier hand blender-whisking works too).
Refrigerate for 30 minutes or longer
Mix in your ice cream maker as directed.
David Lebovitz link for making ice cream if you do not have an ice cream freezer.
Links to helpful tips:
Folding video demonstration.
Egg Whipping video demonstration.
Enjoy!
-Erica


